Understanding how to bypass PCM voltage regulator will help you overcome the challenges of a bad voltage regulator.
Since the voltage regulator is a vital component responsible for keeping voltages within the convenient range suitable for the electrical components that work by consuming the voltage provided, it is essential to ensure it’s working correctly.
If your car’s engine sputters or stalls once in a while, your vehicle’s lights suddenly go dim, or the battery suddenly dies, it is most likely you have a bad voltage regulator that needs to be fixed as soon as possible. A simple voltage regulator bypass can resolve the issue.
How to Bypass Voltage Regulator
There are two (2) preliminary phases that you would need to go through before commencing the voltage regulator bypass. They are;
- Alternator regulator setup phase
First and foremost, you would have to make your external alternator voltage regulator. To do this;
Step 1: Connect the harness to the alternator
There are two wires that you would need to connect from the harness to the alternator. The two wires from the harness maybe blue and white, blue and green, or both black.
If you have a blue wire with the inscription (F), connect it to the alternator; then, attach the green or white one to the alternator’s plug on another side. Meanwhile, there is another red wire with the inscription (A) that is connected to the battery’s positive terminal.
Step 2: Take the wire connections
It is essential to properly tape the wires to protect them from a fuse or leakage. Then, mount the harness plug into the alternator VR.
- Regulator connection (bypassing) phase
Secondly, connect the alternator regulator to the car’s battery and the ECM panel. To do this;
Step 1: Open the front engine hood
You will have to open the car’s front engine hood to enable you to locate the voltage regulator. Ensure that the car’s engine is cold enough so that it doesn’t burn you in the process of working with the wires. You may also want to use hand gloves in this process.
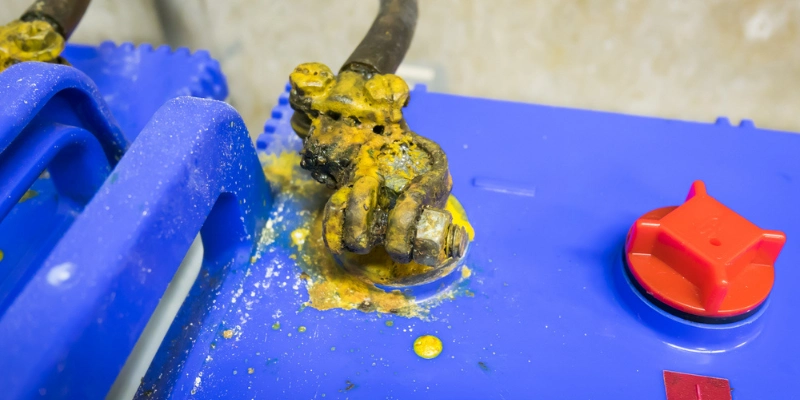
Step 2: Disconnect terminals from the battery
To block all power sources from the car’s battery to the voltage, you must disconnect the battery terminals from the battery. Endeavor to remove the red and black wires, which signify positive and negative respectively.
Step 3: Check out for the voltage regulator socket
The voltage regulator socket is most likely situated in attachment to the car’s computer panel near the voltage regulator. It is a rectangular shape socket with voltage wires. After finding out the socket, connect the alternator to it.
Step 4: Mount your external alternator VR
This time around, mount the external voltage regulator on the firewall or the inner fender with bolt screws. Then, to enable grounding, use one sheet metal screw.
Step 5: Connect the wires to the alternator VR
Now, identify the blue wire from the alternator and connect it to the voltage regulator’s bottom post. Then, the green wire should be connected to the voltage regulator’s top post. They are 12V wires projecting from a 12V key switch.
Step 6: Connect a fuse box to the VR switch
Identify the 12V key switch from the back of the switchboard panel to enable you to connect the fuse box. The switch usually has an inscription, “Power Window.” Get a fuse hooked into the switch box bottom slot.
Step 7: Connect the wire to the battery
At this point, connect the red wire to the battery’s positive terminal, and connect the grounding wire projecting from the alternator regulator to any of the ports on the voltage regulator to complete the bypassing of the voltage regulator.
Can You Bypass Voltage Regulator?
Yes, you can bypass a voltage regulator if you discover that the voltage regulator is bad, which is easy to ascertain through a voltage supplying problem in the process of testing a voltage regulator with a multimeter. To bypass your voltage regulator, you need an aftermarket voltage regulator, regulator plug harness, and wires for the connection.
However, you don’t jump into bypassing your voltage regulator until you are sure there is a need to conduct the bypassing. To ascertain whether you need to bypass the regulator or not, you must have conducted a test on the voltage regulator. Testing a voltage regulator is pretty easy; to do this;
Step 1: Connect the multimeter
First and foremost, connect the multimeter with the car’s engine battery. To do this perfectly, fix the multimeter’s red wire to the battery’s positive (+) terminal and the black one to the battery’s negative (-) terminal. After that, switch on the multimeter by regulating the knob towards the Voltage (V) DC area.
Step 2: Start the car’s engine
After the connection in (Step 1 above), start the car’s engine. The multimeter voltage will read on the screen. It would be around 12.6 Volt.
Step 3: Increase the car’s engine power
At this point, you should boost up the car’s engine power by increasing the fuel power. Then, set its idle on a range of 1500 to 2000 RPM. In doing this, if you notice that as you increase the RPM, the voltage also increases, it is a sign that the voltage regulator is bad and needs to be repaired or replaced.
How to bypass PCM voltage regulator GM
To bypass a GM Power Constraint Module (PCM) voltage regulator, you need an aftermarket voltage regulator, a regulator plug harness, and wires for the connection. With the following steps, you can make an alternator that will act as an external voltage regulator.
Step 1: Setup the alternator VR
Firstly, you must perform a setup on the alternator regulator. To do this, connect the harness with the alternator using a blue (sometimes with the inscription “F”) and a green wire or blue and white wires, as the case may be. Then, another red wire (sometimes with the inscription “A”) is connected to the battery’s positive terminal.
Then, tape the wires to protect them from a fuse of possible leakage. After that, mount the harness plug into the alternator VR.
Step 2: Perform the alternator regulator wiring
To commence the wiring of the alternator regulator, open the front engine hood of the vehicle and ensure that it cools down before performing any connections so that you don’t burn your hands. You can as well use hand gloves.
Step 3: Block all power sources
Disconnect the battery terminals so that all power sources are blocked. It entails the disconnection of the positive and negative terminals of the battery.
Step 4: Locate the VR socket
To locate the voltage regulator socket, check the vehicle computer panel near the voltage regulator; it is situated right there is a rectangular socket. After identifying the socket, proceed to connect the alternator with the socket.
Step 5: Fix the external alternator
It’s time to mount the external alternator voltage regulator on the firewall or the inner fender using some bolt screws; then, you need one metal screw for grounding.
Step 6: Connect the wires to the alternator VR
Identify the blue wire from the alternator and connect it to the bottom post of the voltage regulator (VR); then, attach the green one to the top post.
Step 7: Connect a fuse box to the VR switch
Identify the 12V key switch located behind the switchboard panel and fix a fuse into the bottom slot of the switch box. The switch has the inscription “Power Window.”
Step 8: Finally, take the red wire and connect it to the car’s battery’s positive (+) terminal. After that, connect the grounding wire from the alternator to any ports on the voltage regulator. When this is done, the voltage regulator bypass is completed.
How to bypass Ford PCM voltage regulator
The following are step-by-step guides to enable you to bypass your Ford PCM voltage regulator.
Step 1: Start the engine to verify the volt
Firstly, start the car and verify the volt with a multimeter; it should be around 12.6 volts. If you notice anything less than 12.6V, that means the battery is not charging.
Step 2: Get a wiring harness
After ascertaining that the volt produced is less than 12.6V, proceed to get a wiring harness to the alternator.
The wiring would include a blue wire written (F); connect it to the alternator; connect the green or white one to the alternator’s plug other side. Another red wire written (A) will have to connect to the battery’s positive terminal. This will help as a jumper for the voltage regulator.
Step 3: Disconnect power from the battery
To disengage all power sources from the car’s battery to the voltage, ensure to disconnect the terminals by removing the red (positive +) and black (negative -) wires from their terminals, respectively.
Step 4: Connect the voltage regulator socket
Locate the voltage regulator socket near the voltage regulator around the vehicle’s computer panel area. It is a rectangular shape socket with voltage wires. Endeavor to connect it to the alternator.
Step 5: Mount the external alternator
Use bolt screws to mount the external alternator to the firewall or on the fender; then, use a metal sheet screw-in grounding it.
Step 6: Connect the wires to the alternator VR
Connect the blue wire projecting from the alternator to the voltage regulator’s bottom post and the green wire to the voltage regulator’s top post. They are both 12V wires.
Step 7: Connect a fuse box to the VR switch
Locate the 12V key switch written “Power Window” and connect a fuse into the bottom slot of the fuse switch box. After that, connect the red wire (A) to the battery’s positive terminal; then, connect the grounding wire from the alternator to any ports of the voltage regulator.
Final Thoughts
If you lack the understanding of how to bypass a PCM voltage regulator, you may be stranded someday and not know how to rectify your vehicle’s voltage regulator.
Endeavor to pay attention to the symptoms of a bad regulator such as when lights dim, the engine sputters or stall unexpectedly, and so on. If you start experiencing these symptoms, it may be time to fix the fault or get a voltage regulator bypass before the problem escalates.
However, you may not need to bypass your car’s voltage regulator when keeping the electrical power supply components under regular maintenance.