If you love to do your own car maintenance, removing the tire off the rim should be a regular chore for you. But for anyone who had not done it yet, can wonder about a lot of facts regarding this task. In this post today, we’ve come up with a complete how-to guide on how to take a tire off a rim at home! We will talk about both the tools and the steps to get done with the steps.
First thing first, let us tell you that – you don’t need any fancy or pricey tools like a tire removal machine to replace an old tire. All you need is proper guidance and a few hand tools.
So, let’s get started –
Method 1: If you want to Remove it without Machines (DIY Method!)
1st method, we will talk about is quite handy. And you don’t need any automatic tire changer for that. Here are the steps…
Items you Need
- A valve core removal tool
- A tire lubricant to apply on the rubber-rim joint
- Tire changing screwdriver
- Pry bar
Step 1: Take out the tire air valve
Place the tire on a flat surface and find out the air valve. Now, take a valve core removal tool and place it on the air valve. Twist it counterclockwise until the cylindrical metal valve comes out.
Step 2: Drive the car for separating the tire bead
There is a bead on the tire which is pretty tightly attached to the car tire. You don’t need to have any tool to remove that off. All you have to do is to drive the car for a while.
Make sure that you’re driving the car on the rubber part of the tire. It will force the bead to come out of the groove.
Step 3: Use your feet to take the sides off the Pry Bar
Now, the tire should be quite loose from the rim. Now, take the car tire on the ground, and use your feet to pressurize on the rubber part of the tire.
While doing that, make sure that the tire can’t get off its place. You can do that by keeping the tire on a carpet or using pressure on the body of the tire.
Make sure to put the front part of the tire down while pressuring the rubber part of the tire. Eventually, the rubber tire will get more loosen up.
Step 4: Apply the Tire Lube
Now, it’s the final stage of making the tire lose from the metal rim. Upon regular use, the car tire can get tightly stuck on the rim. You need to apply lube on the rubber tire-rim joint to make that loose.
In the absence of a car tire lubricant, you can use homemade dishwasher soap to get it done. But we highly recommend going with lubricants that are made for automotive purposes.
Step 5: Lift the Tire over the top Lip of the Rim
This is the final stage of taking the tire off the rim. You need to have a screwdriver and a pry bar. With your feet, push down the rubber part at the external side. Now, slide the pry bar underneath the rubber part. Keep lifting it up until the bead is above the rim. Now, take the screwdriver and work around the tire to take the bead up.
Keep doing that until the whole bead is over the rim on every side of the tire. Make sure to keep the pressure at a constant level.
Step 6: Take the Tire out
By this step, the tire should completely loosen up from the tire rim. Now, you have to take the tire out and separate them both with the pry bar. Make sure that you’re doing that through all the sides of the tire.
Here’s a video clip for making it Easier!
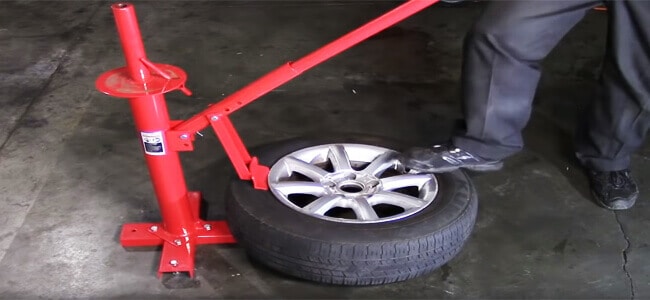
Method 2: With the Help of Car Tire Remover Machine
There is both cheap and costly manual tire changing machine available in the market. Taking the tire off by hand may be cheap and cost-free, but it’s risky and noob users may lead to accidental incidents with it. Instead, we would recommend having a manual car tire changing machine and get the job done with much more ease.
Items you Need
Step 1: Setup the Machine
In the first place, you need to place the car tire changing machine on plywood. Trace the base of the machine first, and then screw it up with the plywood. Make sure the connection is tight enough.
Step 2: Empty up the tire air
Take off the air valve with an air valve removal tool. As you are done, make sure it’s completely free of air, and place it on the car tire removal machine.
Step 3: Set the tire up on the car tire changing machine
Now, take the tire off the ground, and place it on the base of the tire changing machine. There would be a small and triangular nub on the base, where you have to fit the tire in.
Use clamps to ensure strong positioning of the car tire.
Step 4: Use the changing rod
There is a changing rod on the car tire change machine. It will separate the metal rim from the rubber part of the tire. You can go with the manual of the machine first, in case you don’t know how to use it. Once you are done with one side of the car tire, alter the tire and do the same process for the other side of the tire as well.
Step 5: Take the rubber part out
By this stage, the car tire should completely loosen up from the metal rim. Use your hands to take out the rubber part of the car tire to separate it from the metal rim.
Every car lover (DIYer) should try this method, how to install car tires by yourself!
If you’re a DIYer person and want to do the task, you should go with the first method. Instead, if you want to get it done quickly and perfectly, the second method is recommended for you.
Conclusion
The rim is a metal ring that holds the tire in place on your car. If you need to take it off, use this tool and these tips to get started.
It’s important not just because of safety concerns but also because there are some situations where you can’t remove the tire without removing the wheel first- like if your battery dies or something else goes wrong with your engine bay. With this quick guide, we showed you how easy it is!